Advanced RAG Chatbot: Quick Guide
- Prerequisites:
- Some familiarity with LLMs and vector embeddings is beneficial but not mandatory.
- Finish the Basic Chatbot tutorial.
- Estimated Time: 10 minutes
- Key Takeaways: In this tutorial, you will learn:
- How to handle Markdown files for RAG applications
- How to create and use vector embeddings
- How to build context-based prompts for vector embeddings
- How to deploy VAKFlow and explore various integration options.
Instructions
In this tutorial, we’ll dive into some advanced features by creating vector embeddings to build a RAG-based chatbot. If you haven’t done so already, be sure to complete the Basic Basic Chatbot first. In this guide, we’ll create an AI assistant for the FoodSprint food delivery startup. Let’s get started!
Step 1: Get Started
- Log in to VAKStudio
Step 2: Create a Prompt Template
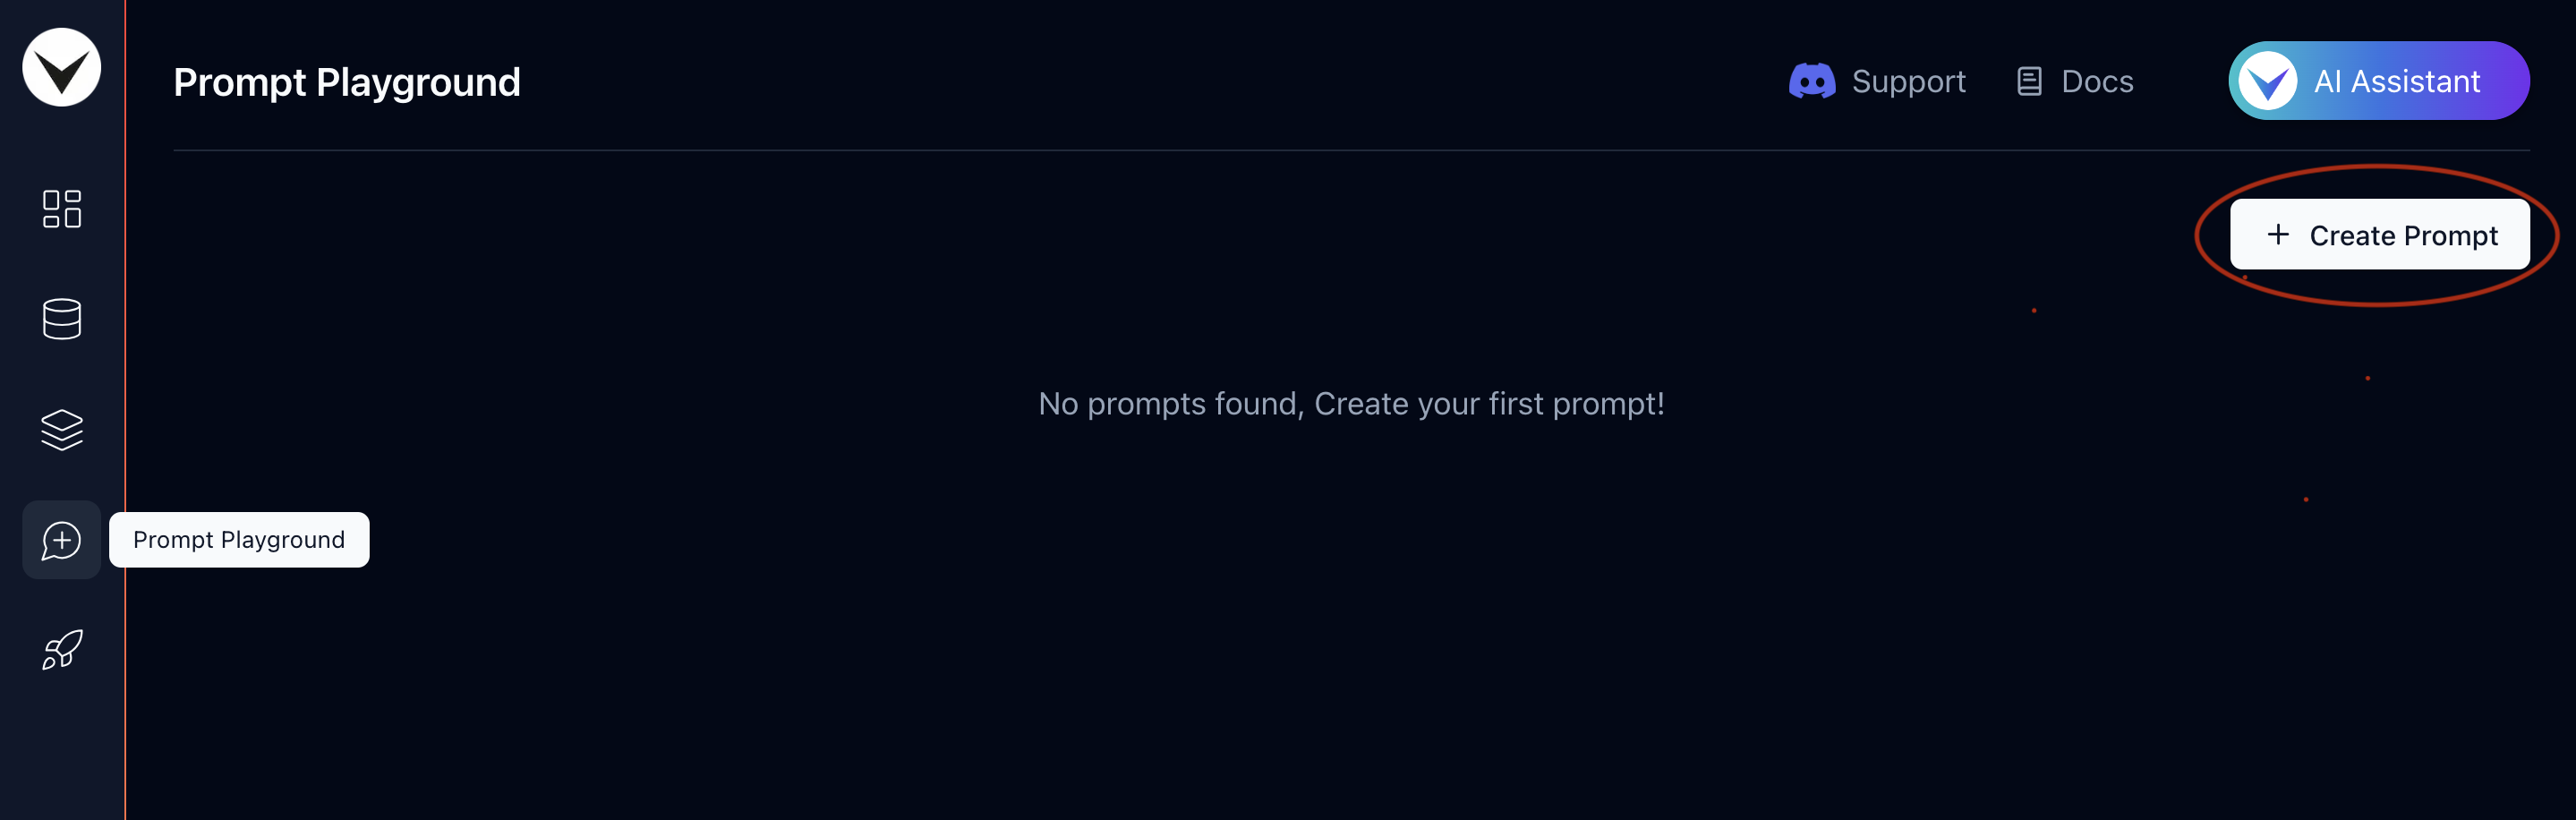
- Go to the "Prompt Playground" tab.
- Click the "Create Prompt" button in the top-right corner to create a new prompt.
- Name the prompt "FoodSprint RAG Prompt" and leave the Description field blank for now.
- Click "Create Prompt" to save it.
Step 3: Add a RAG Prompt
While there are multiple options in the prompt template, we’ll focus on adding RAG context to the prompt for this tutorial.
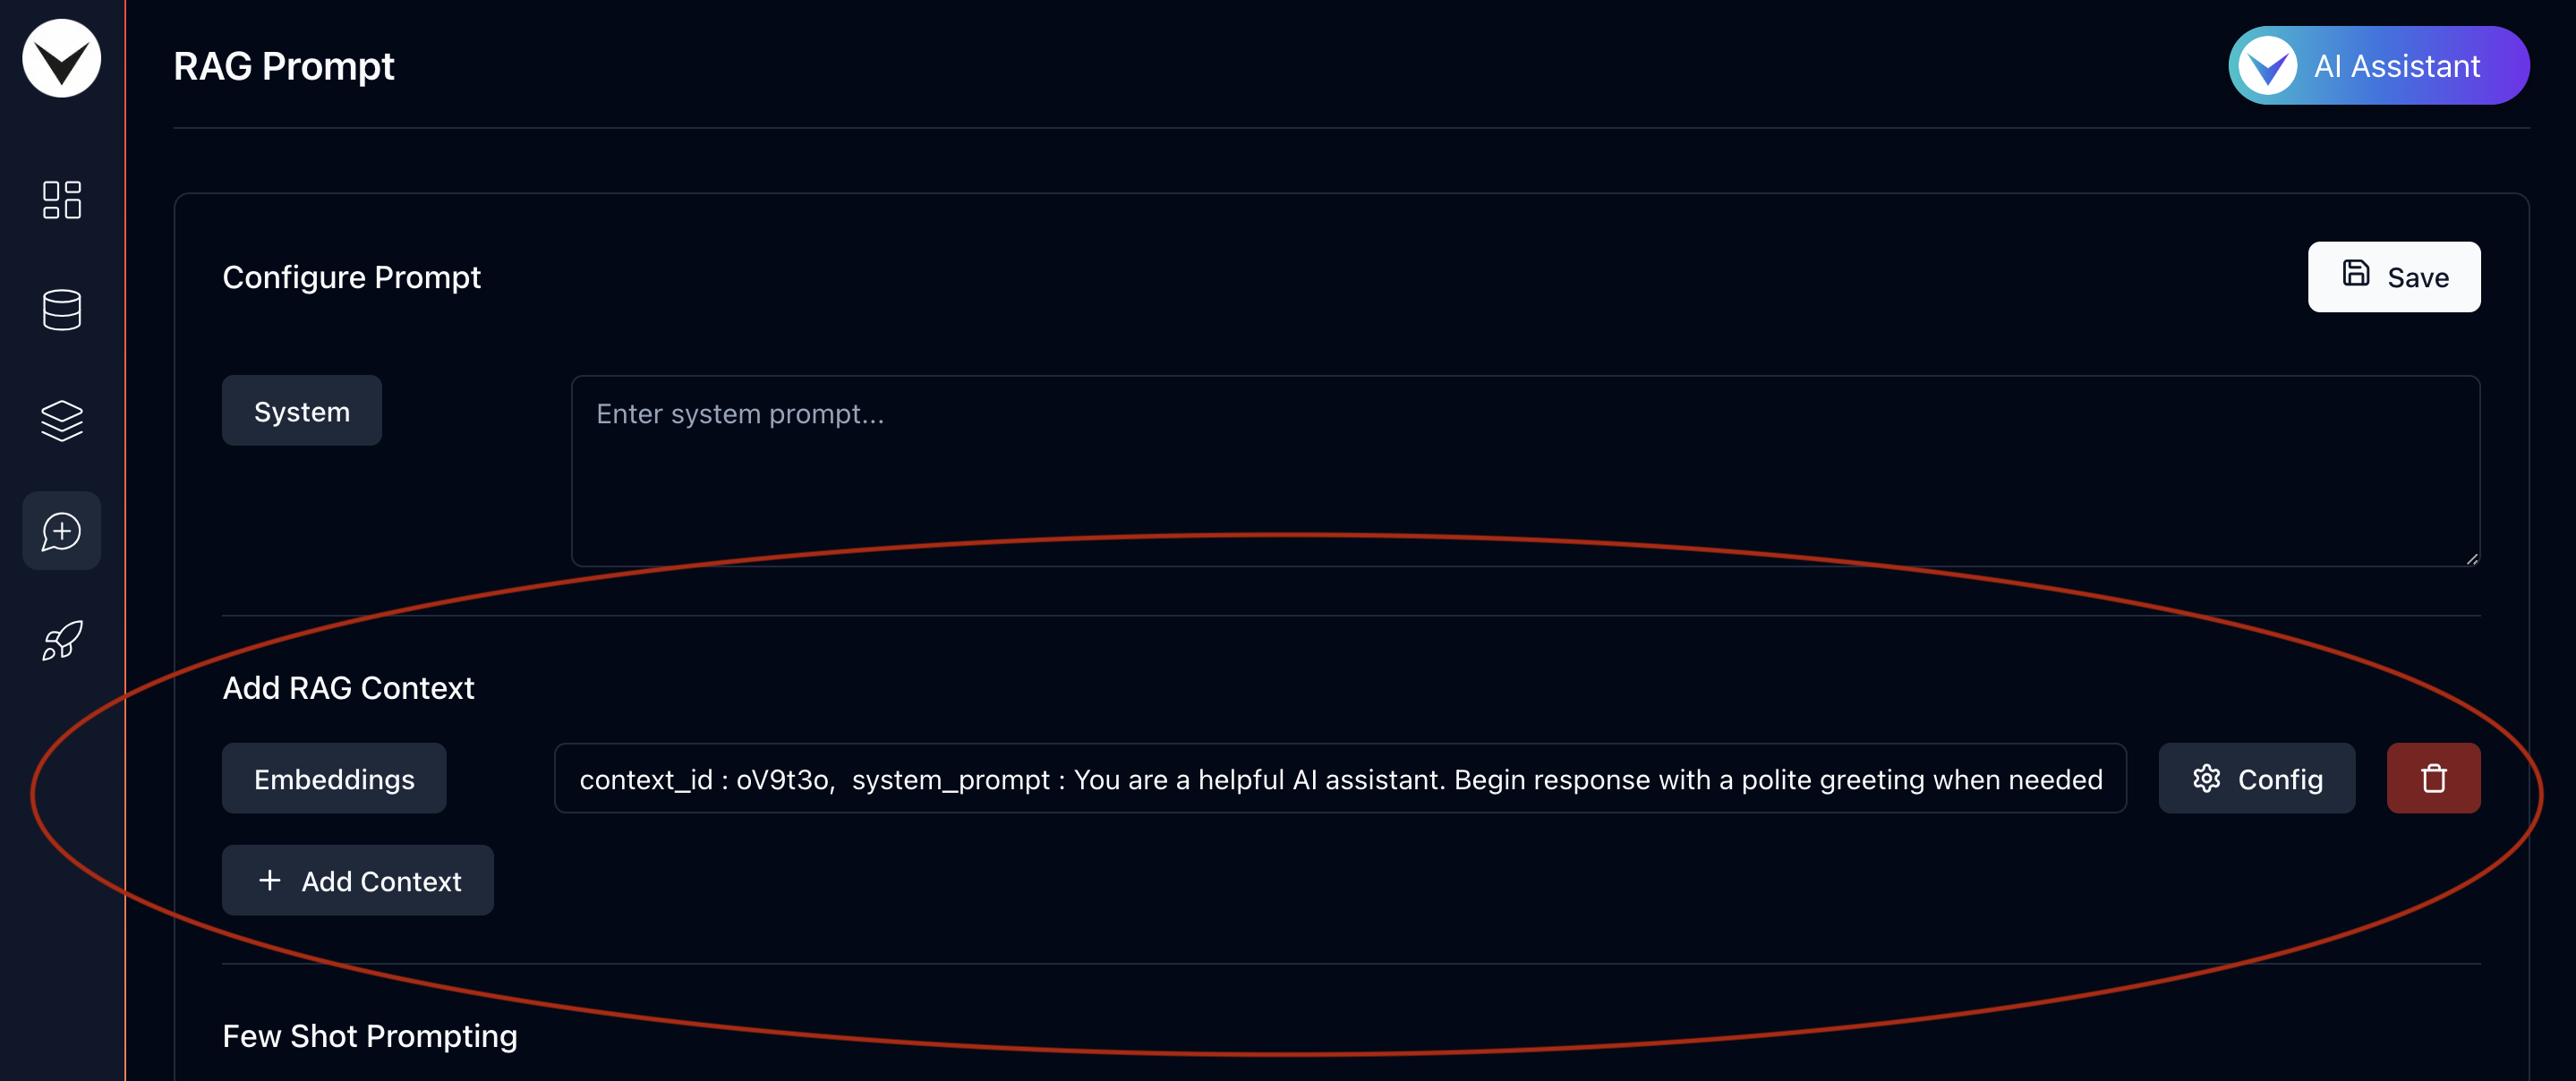
- Once you create a prompt, you will be automatically redirected to the newly created prompt page, where you can configure its settings.
- To do this, click the "Add Context" button under the "Add RAG Context" section. This will automatically load the preset embedding context prompt.
- If you'd like to modify or review the context prompt, click the "Config" button.
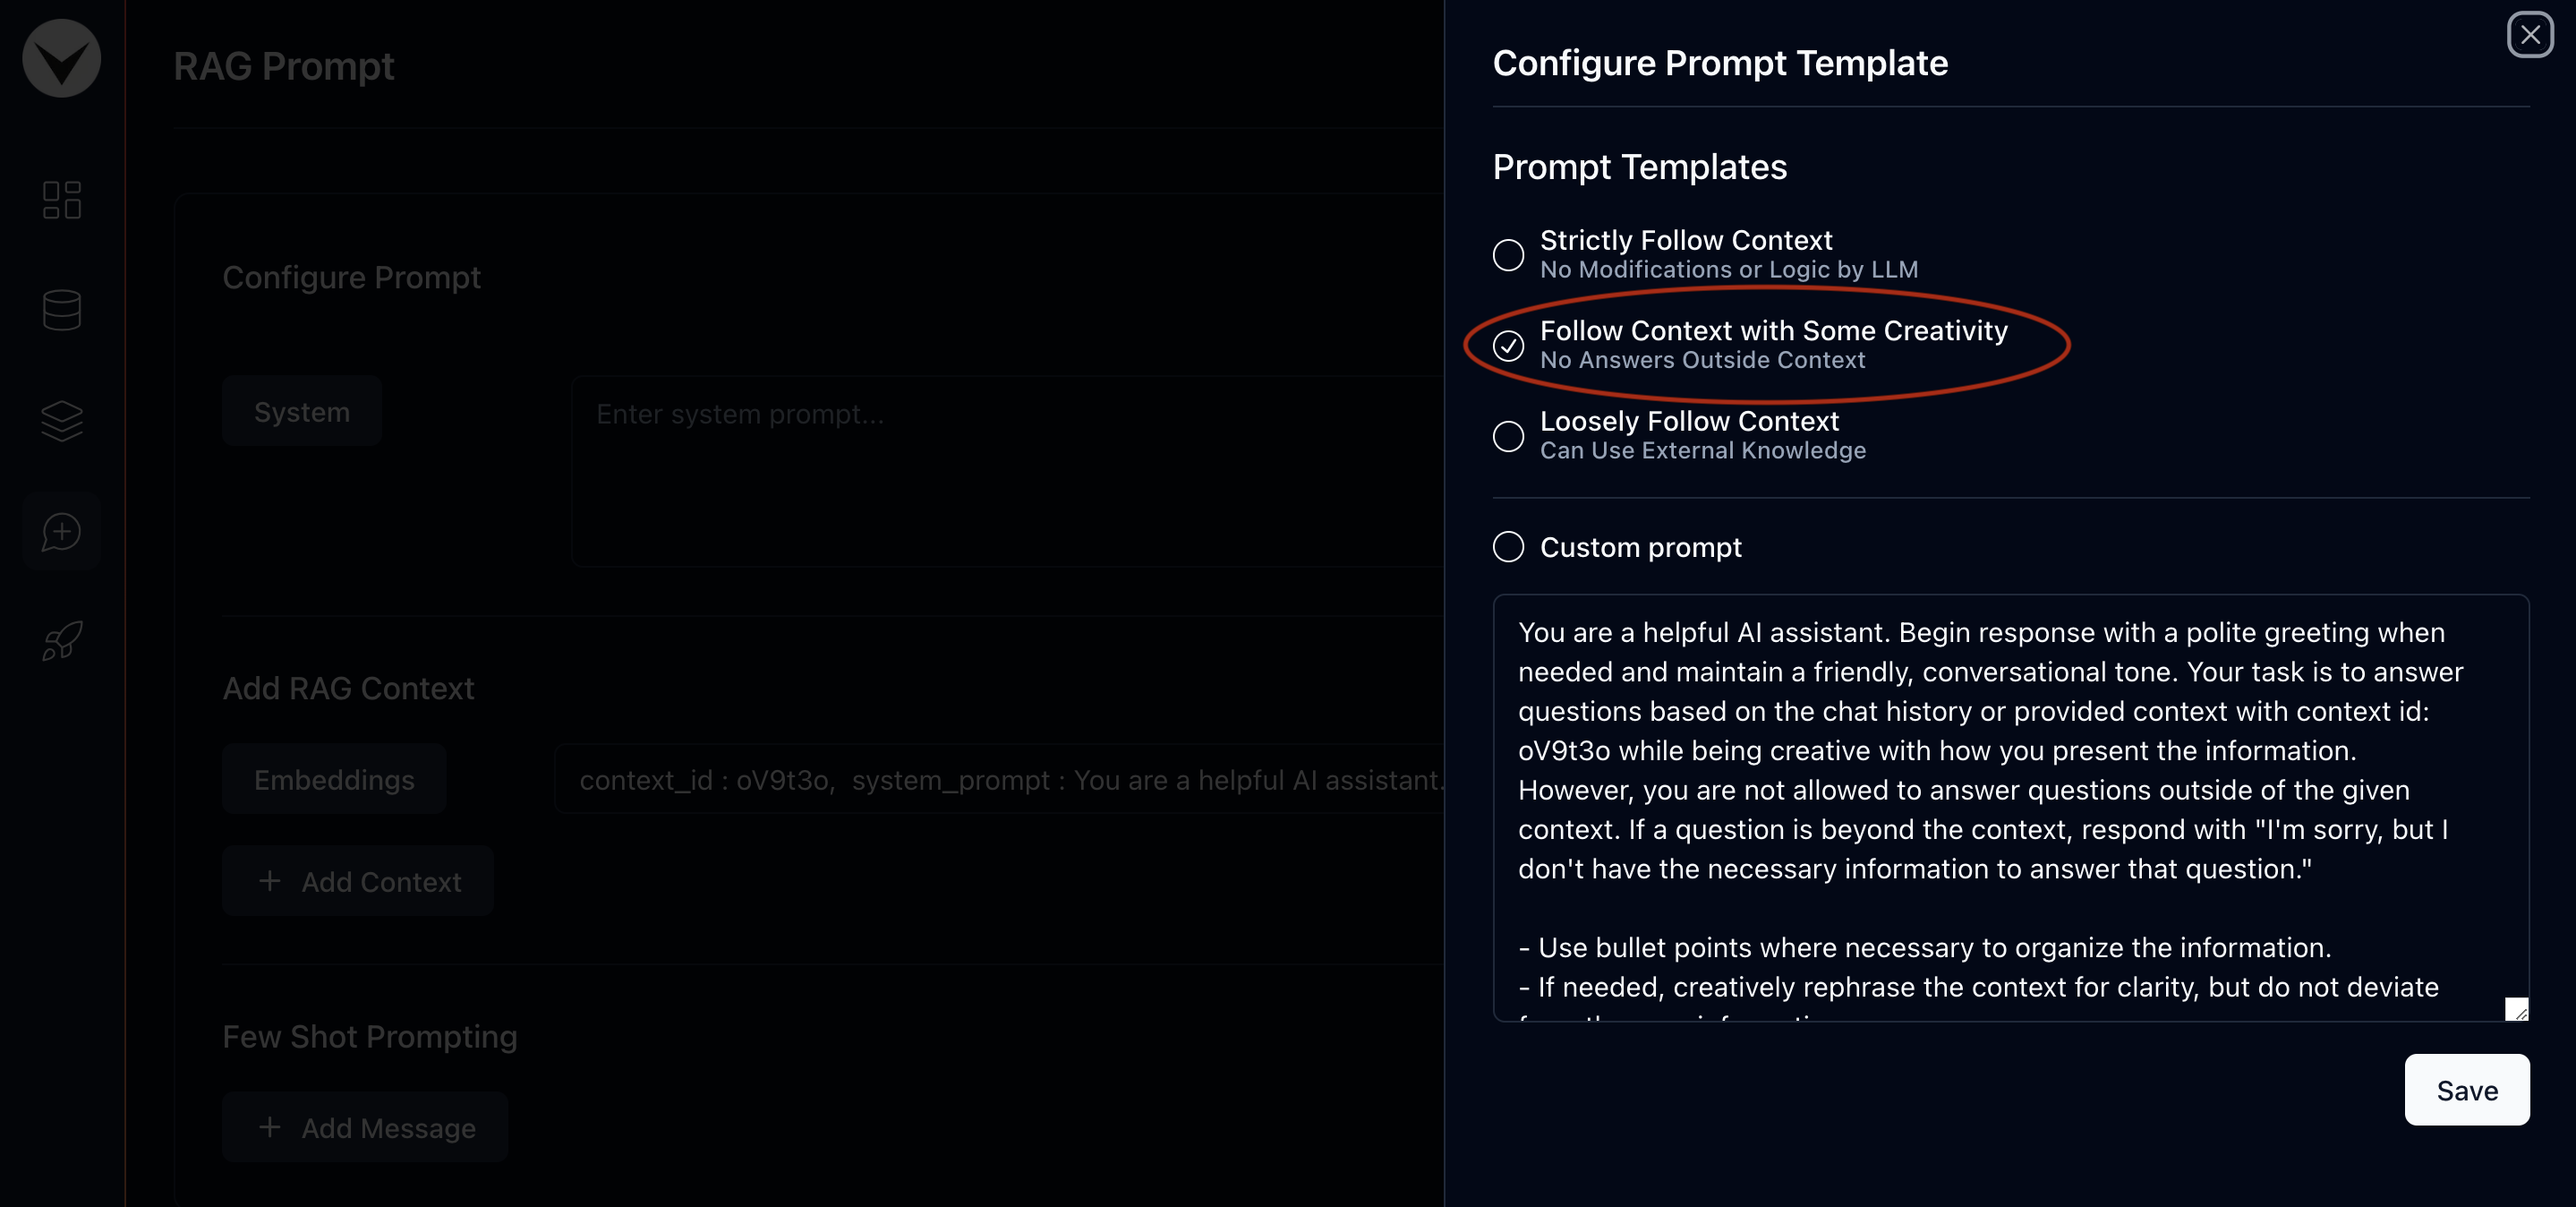
- A side panel will open where you can toggle between pre-loaded prompt templates with context IDs or create a custom prompt for embedding context.
- For this tutorial, we’ll proceed with the default prompt, "Follow Context With Some Creativity."
- Close the config panel and click "Save" in the top-right corner to apply your changes.
Step 4: Uploading Markdown files
To generate embeddings for the prompt context, we'll first need to upload a Markdown files with custom data to the datastore. For this tutorial, we'll use a simple dataset to create an AI assistant for FoodSprint.
-
Download the files by clicking the following links. We'll use these Markdown files to create vector embeddings:
Be sure to change the file extensions to .md before uploading them.
- Next, head over to VAKStudio and navigate to the Datastore tab in the sidebar. Then, click on the "Markdown Files" tab at the top-left corner.
- Click the "Create Folder" button, enter "FoodSprint Files" as the name, and then click "Create Folder" to confirm.
- Next, click on the folder to open it.
- Once inside, click the "Upload Files" button at the top-right corner.
- Drag and drop the files you just downloaded.
- Finally, click "Upload Files" to complete the upload.

Step 5: Creating Vector Embeddings
With the Markdown files uploaded, let's proceed to create vector embeddings from it.
- Go to VAKStudio and open the Vector Database tab from the sidebar.
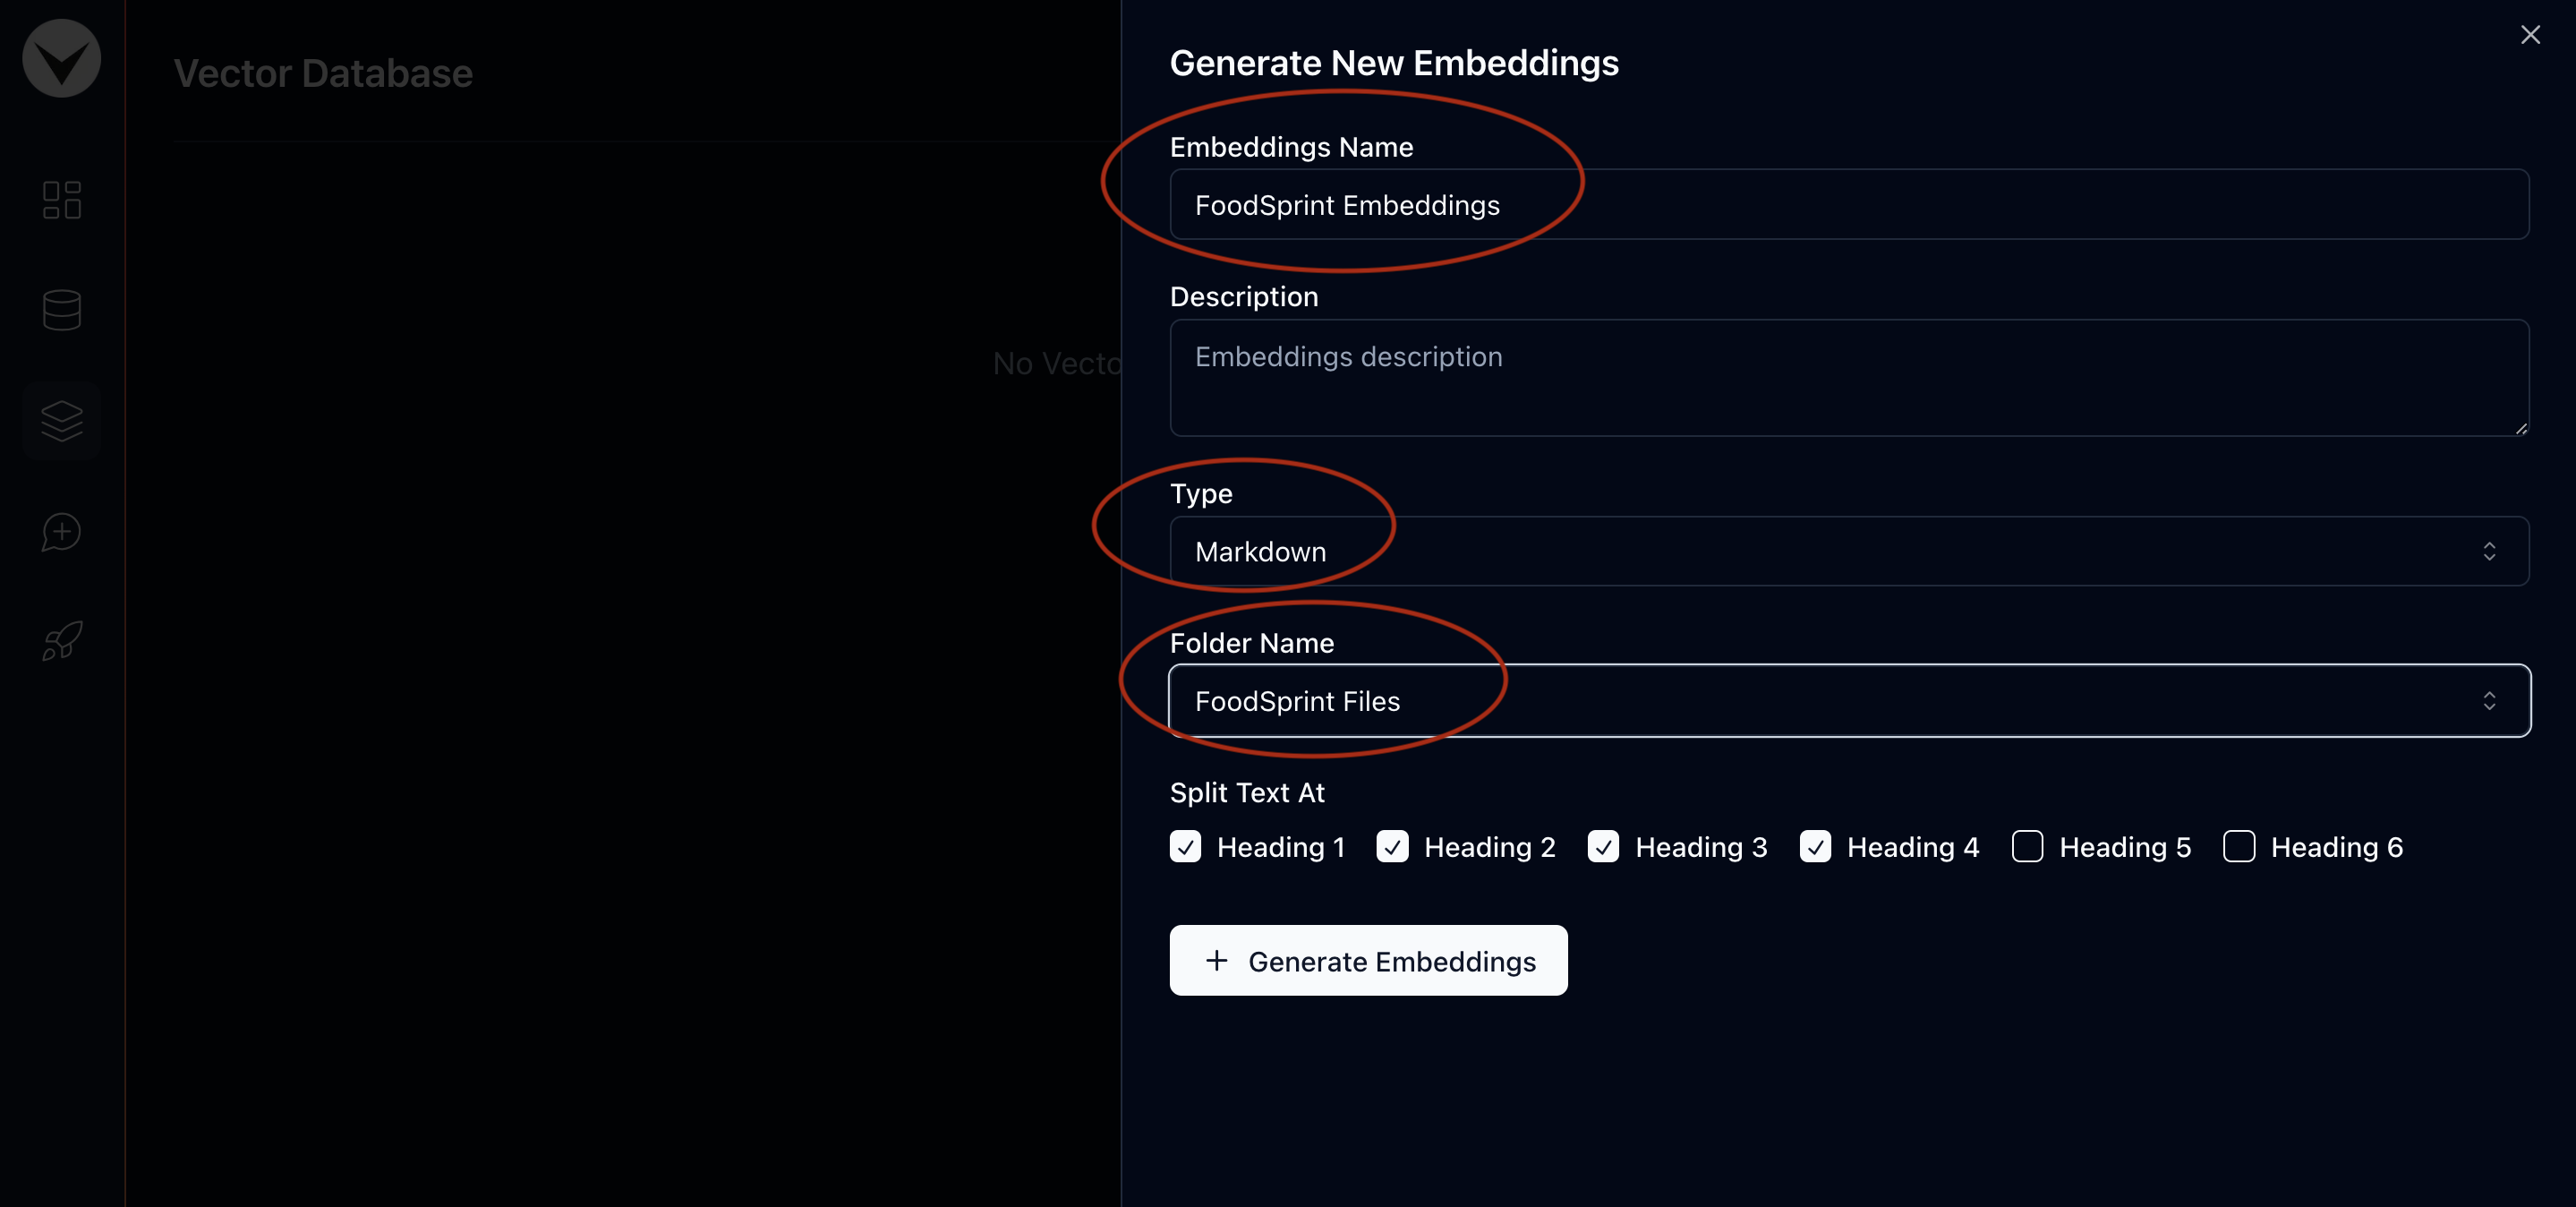
- To generate new vector embeddings, click the "New Embeddings" button in the top-right corner.
- Name it
FoodSprint Embeddingsand provide an appropriate description. - Select
Markdownas the type from the dropdown menu and chooseFoodSprint Filesas the Folder Name. Keep all other settings as default for this tutorial. - Click "Generate Embeddings" to start the process. The creation may take a few seconds, so please wait while the embeddings are generated.
Step 6: Creating a VAKFlow
With everything set, it's time to create your VAKFlow.
- Go to the VAKFlow Playground from the sidebar.
- Click the "Create VAKFlow" button in the top-right corner to start a new flow.
- Name it "FoodSprint RAG VAKFlow" and add a suitable description.
- Click "Create VAKFlow" to complete the setup.
Step 7: Building a RAG Chatbot
Now that everything is ready, let's create the RAG Chatbot.
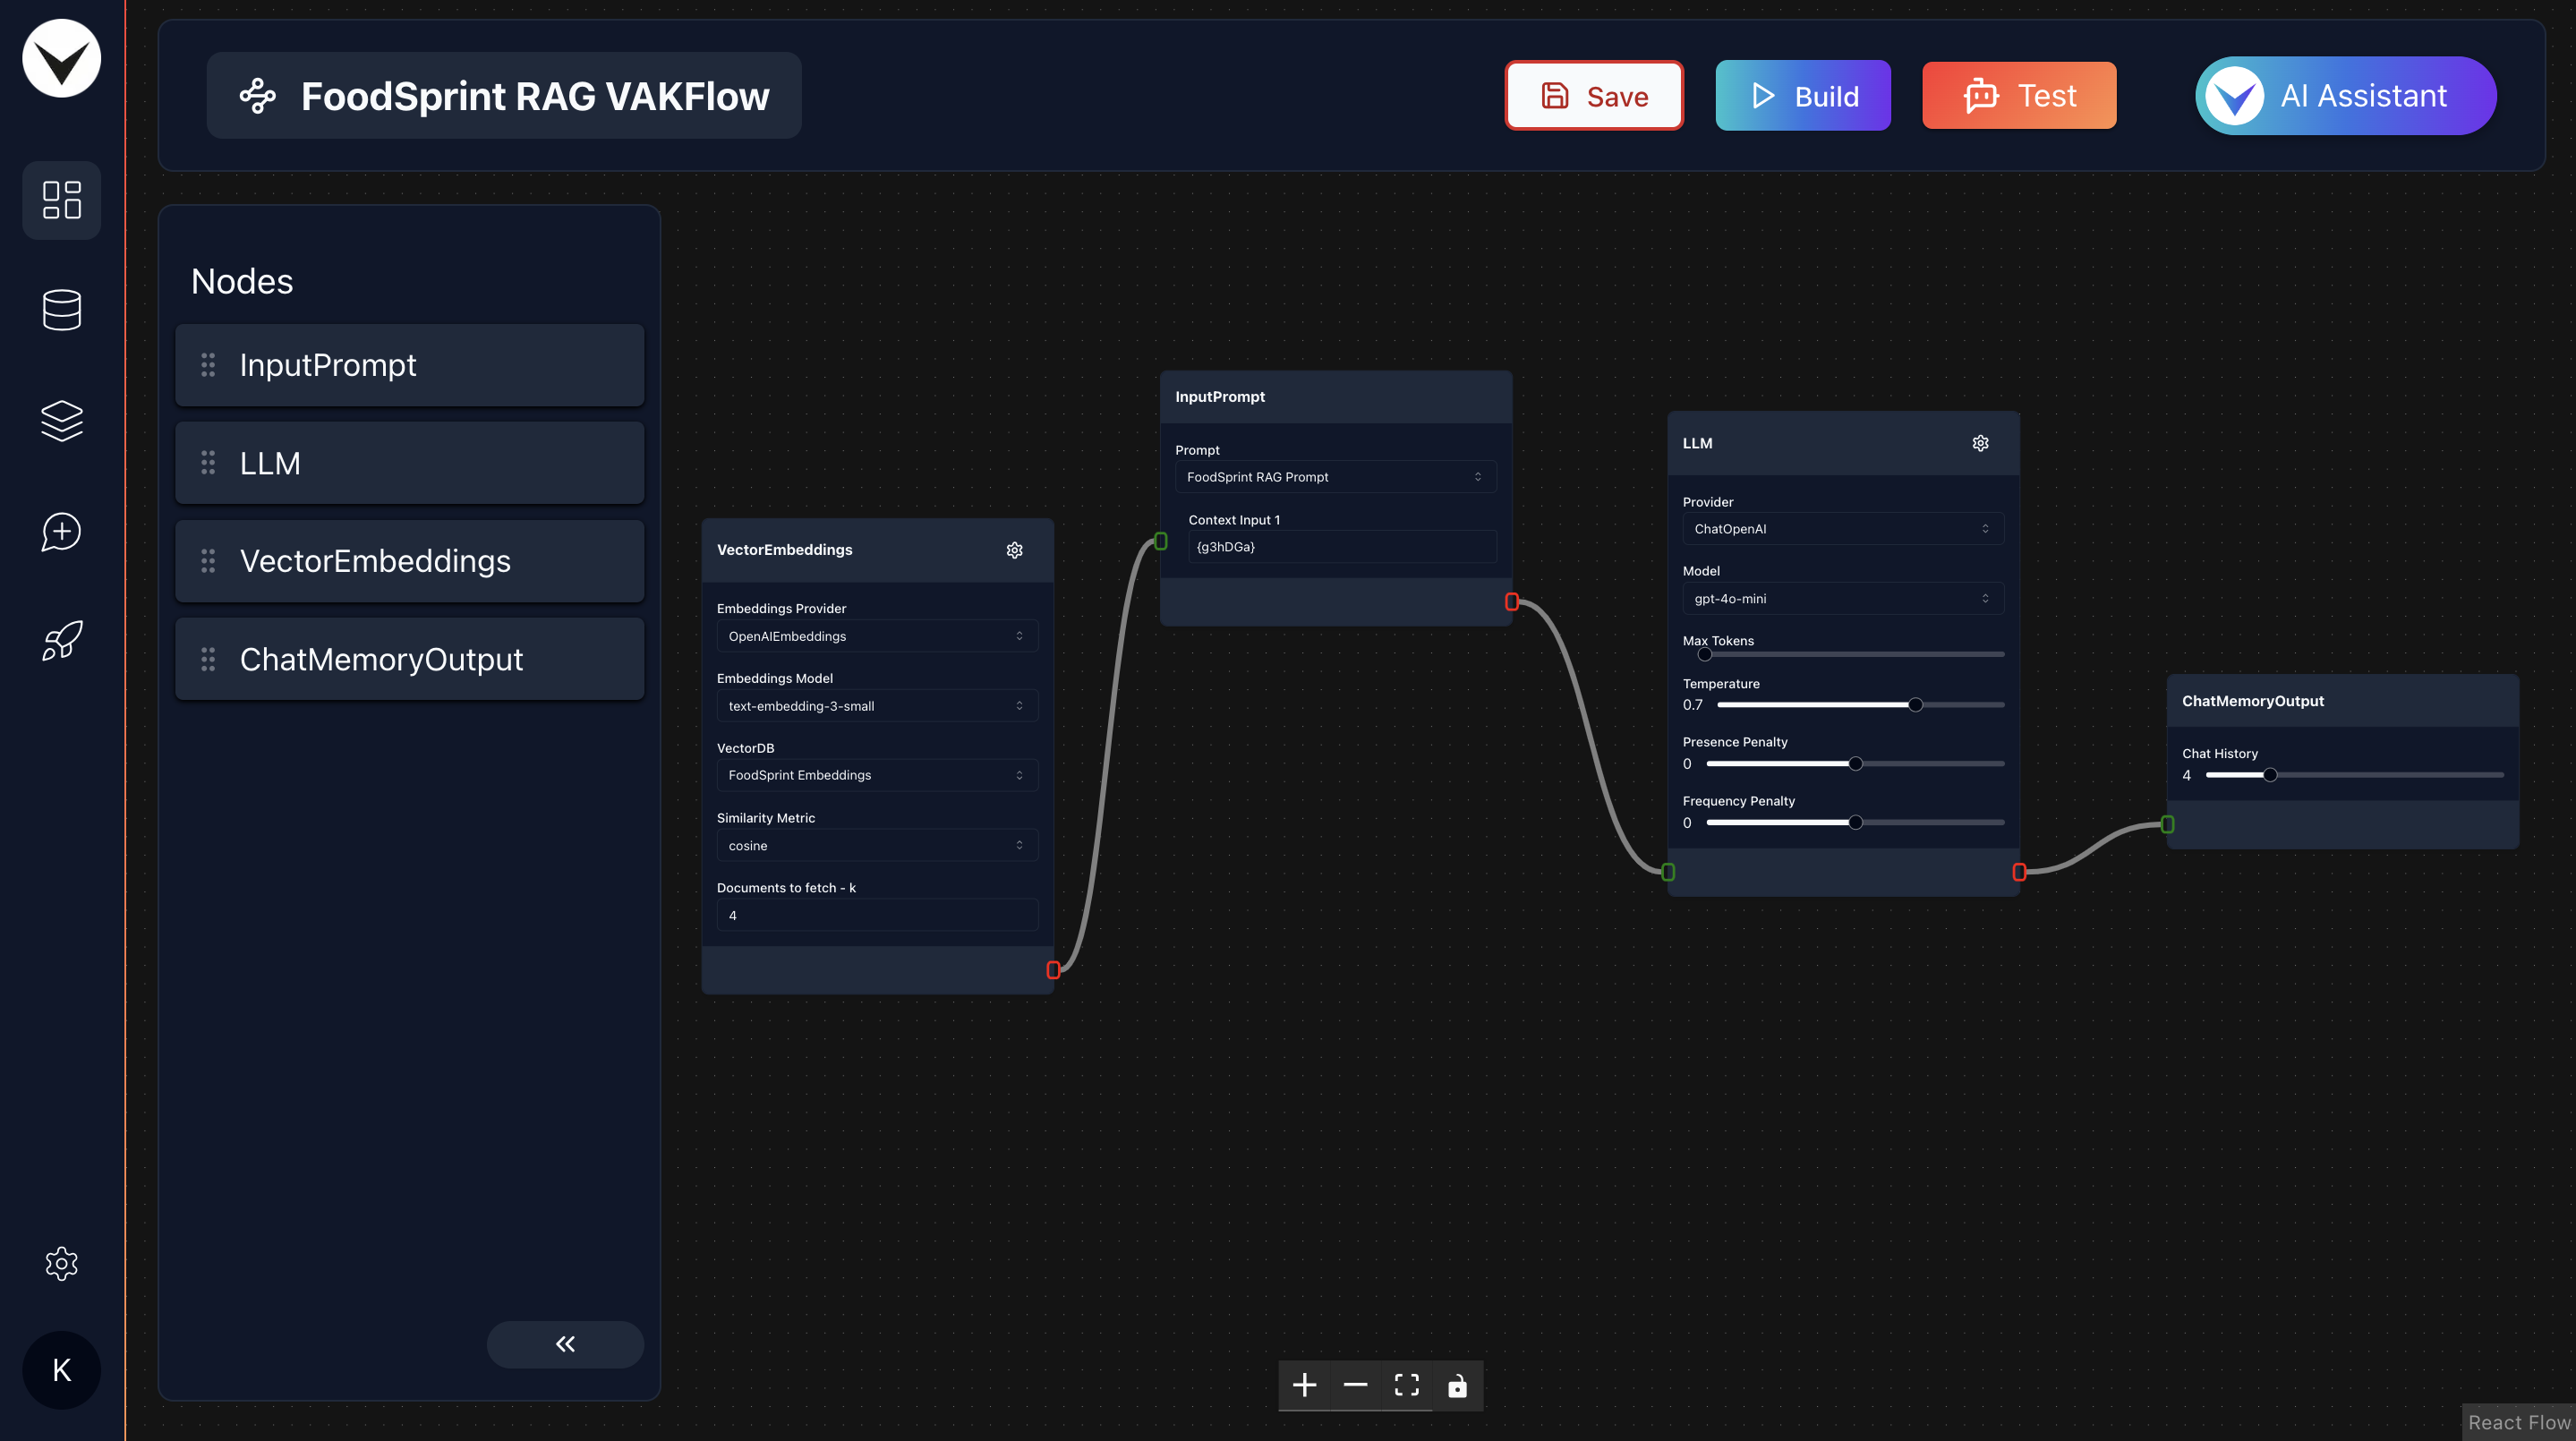
- Open the newly created VAKFlow by selecting "Create VAKFlow" from the list. This will take you to the drag-and-drop LLM orchestration playground.
- Drag and drop four nodes from left to right: VectorEmbeddings, InputPrompt, LLM, and ChatMemoryOutput.
- In the VectorEmbeddings node, select
FoodSprint Embeddingsfrom the VectorDB dropdown. - In the InputPrompt node, choose the "FoodSprint RAG Prompt" template from the dropdown to use the prompt created in Step 3.
- Connect the output (red edge) of the VectorEmbeddings node to the
Context input 1(green edge) of the InputPrompt node. - Connect the output (red edge) of the InputPrompt node to the input (green edge) of the LLM node.
- Then, connect the output (red edge) of the LLM node to the input (green edge) of the ChatMemoryOutput node.
- Finally, click "Save" in the top-right corner to save your VAKFlow.
Step 8 : Build & Testing
- Now let's build the VAKFlow by clicking on "Build" button at the top-right corner, and you are ready to test the AI Chatbot.
- To test the AI Chatbot, click on "Test" button at the top right of the screen. This will open up a chat popup to interact with AI Chatbot.
- Try chatting with AI Chatbot. Few sample queries are :
What are the starter options available?
Give me Mexican dessert options
How much time it will take to get delivery?
I want refund

And that’s it! Your Chatbot is now ready to use!
What Next?
- Have fun playing & experimenting with it!
- Experiment with prompt templates to build unique & interesting LLM applications.
- Experiment with different tunable paramters of nodes.
- Configure your chatbot to integrate the chatbot into your website/app using various options like VAKChat for ReactJS, Vanilla JS or REST API for streaming the response.